Spatial Manager have some utilities for working with terrains and elevations, one of them allows to search elevations for existing points. Doing some steps it is possible to create a data field and store in it the elevation value, even adding it to other existing fields.
Available for AutoCAD, BricsCAD, ZWCAD and GstarCAD
1. Existing points with data without elevation
- Having some points with X-Y coordinates, but without elevation values, the goal is to add a data field with the value of elevation (Z coordinate)
2. Create layer and download elevations
- Create a new layer and set as current layer
- Execute SPMTERRAIN command
- Select “Select points from drawing” option and select the existing points in the drawing
- When asking if you want to download elevations from online services, click yes
- In the section “Objects to create” check “3D points” and click OK
- A new set of points will be created in the current layer
3. Create table and field for elevation values
- These new points have elevation/Z position, but there have no data attached
- Execute SPMDATATABLEDEFINE command and create a new table with a field of type decimal number
4. Attach table with points with elevations
- Select all the poits created in the step 2
- Execute SPMDATATABLEATTACH command
- Select the table created on the step 3 and “Attach to the current selection” option
- Now the points have the table attached but with empy values
5. Set elevation value from geometry
- Execute SPMDATACALCULATOR command
- Select the new empty table as source table
- On the expression panel select Geometry/ElevationZ
- For “Save value in” select “Update existing field” and the empty field created on step 3 and click OK
- Now the points have the elevation value both in the position Z for the geometry and as data table attached
6. Join previous data and elevation data
- For the last step original points and new points with height values will be join and the resulting points will have
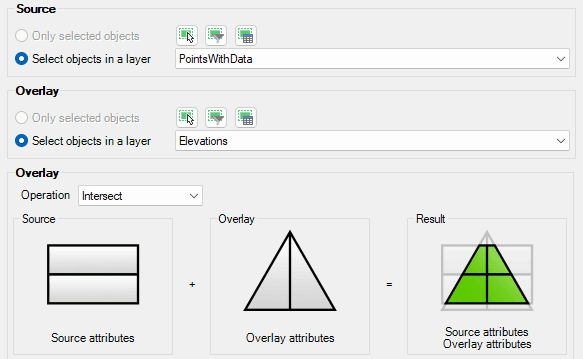
- Execute SPMOVERLAY command
- As source select the original points layer
- As overlay select the new points layer
- For operation keep Intersect selected
- Set the desired name of the final resulting layer and table
- Review the final result, the created points have both source data fields and a new field for elevation/height
Note: Some functionalities can be found in the Standard or Professional editions only


